Ultimate Chocolate Peanut Butter Swirl Brownies
*This post may contain affiliate links. See our affiliate policy here.
Fudgy, gooey and full of chocolate with peanut butter swirled through the top, these chocolate peanut butter brownies are incredibly delicious.
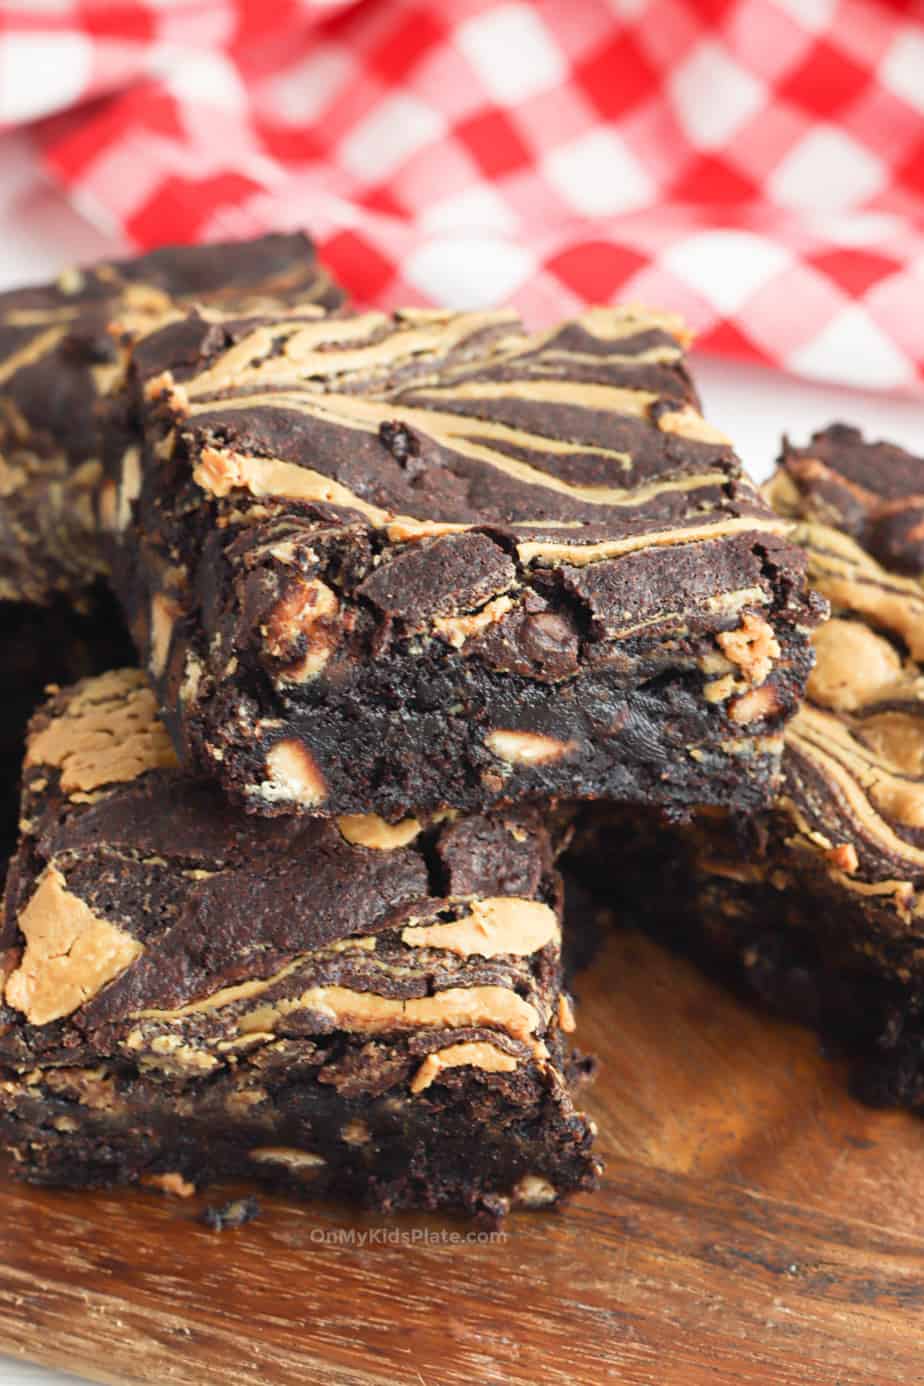
Table of Contents
Why We Love Peanut Butter Swirl Brownies
Made with rich cocoa powder, peanut butter and peanut butter chips, your mouth will burst with peanut butter flavor with every bite. This is my favorite brownie recipe for when I have peanut butter lovers coming to my house!
How To Make Chocolate Fudgy Peanut Butter Brownies With A Swirl Top
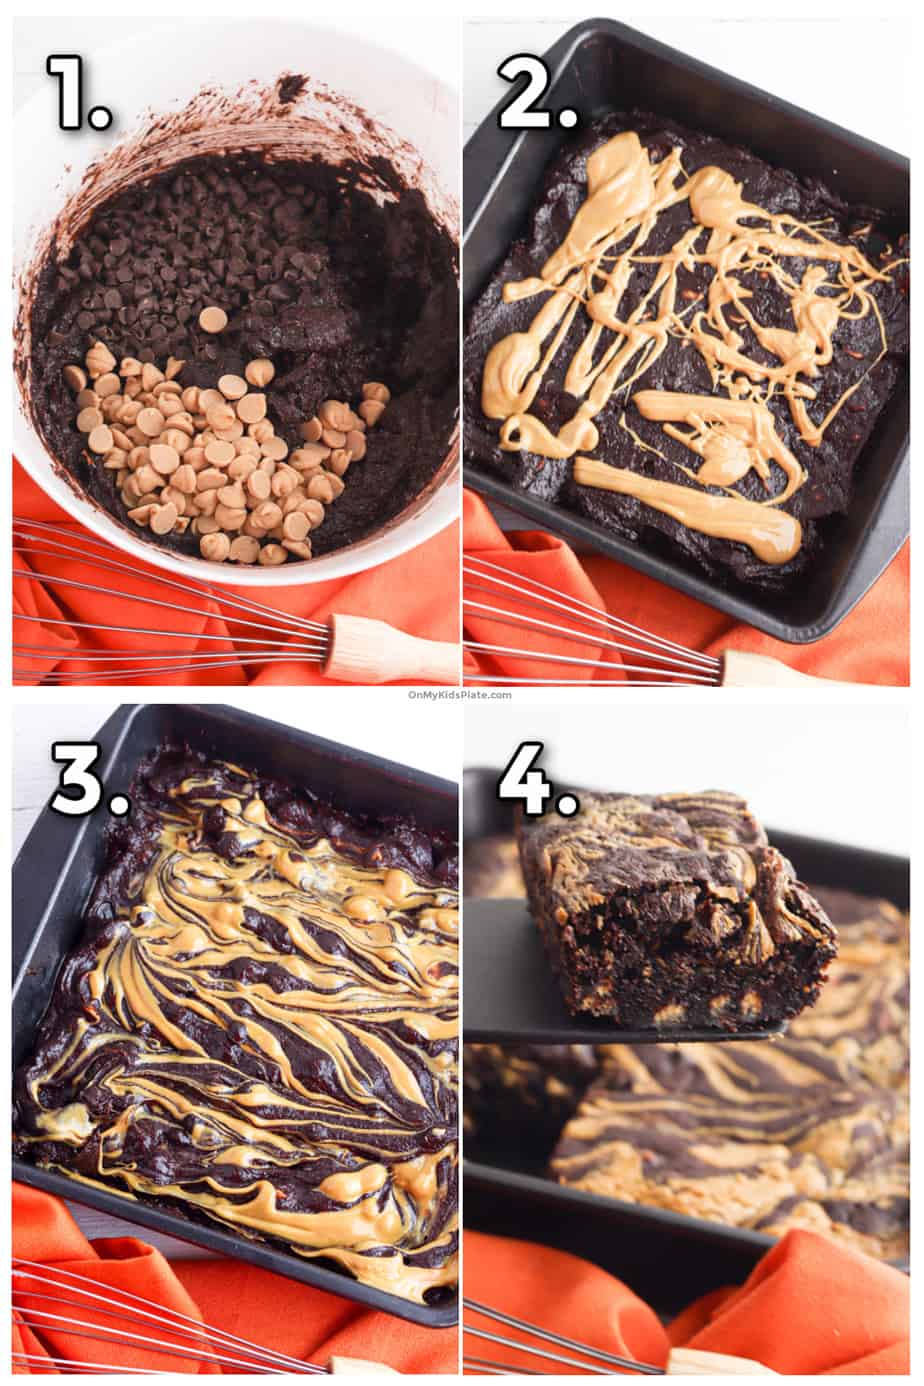
- Mix Together Brownie Batter– Mix together wet ingredients first (eggs, sugar, brown sugar, vanilla and then melted butter) Then add the dry ingredients (all purpose flour, cocoa) until a batter forms. Keep the brownies fudgier by mixing them until they are just combined. Unlike something like frosting, we don’t want to whip the batter. We don’t want to create lots of pockets of air in the batter which can make the brownies taste more cake like. Then mix in the chocolate chips and peanut butter chips. Add the batter into the prepared square pan.
- Drizzle Peanut Butter – Heat the peanut butter in the microwave until it’s just warm, about 20-30 seconds. Drizzle warm, creamy peanut butter over the top of the chocolate mixture. Try to spread it out as much as possible so you don’t have too many large clumps of peanut butter that you’ll have to spread in the next step.
- Swirl The Top Of The Brownie Batter– Using a butter knife or a chopstick, run it through the batter to create swirl patterns in the peanut butter mixture on top of the chocolate. You want to do this enough that it has a great pattern so it looks kind of like tie-dye.
- Bake Brownies– Bake brownies in the oven at 350 for 25-30 minutes. Do a toothpick test by placing it into the center of the pan, avoiding large pieces of melted peanut butter .You want the texture of the brownies to be fudgy with moist crumbs, but not raw in the center. This will allow you to finish with fudgy peanut butter brownies that are the perfect brownie!
Can I Use Natural Peanut Butter In These Brownies?
You can use natural peanut butter to top these fudgy chocolate brownies. Both crunchy peanut butter or smooth peanut butter work on top of brownie batter. There are a couple things to keep in mind when using natural peanut butter.
- Stir The Peanut Butter Well– You want to make sure all of the oil is well mixed into the peanut butter.
- Natural Peanut Butter Can Be Runny– It’s totally ok that natural peanut butter can be a bit on the runny side, it will be fine when it bakes. You may not have to heat the peanut butter to get it to swirl in the brownies since it’s a bit runnier.
- Natural Peanut Butter Is Less Sweet– These brownies are pretty sweet, but know if you use natural peanut butter it does reduce the overall sweetness of the dessert.
Substitutions For This Chocolate Peanut Butter Brownie Recipe
Here are a few ways to mix up these brownies this time, or next time you make the recipe!
Try A Different Nut Butter– Almond Butter, Cashew Butter, or other types of nut butter can be swapped cup for cup in this peanut butter brownie recipe.
Swap Out The Peanut Butter Chips For Peanut Butter– If you don’t have peanut butter chips, you can swap out some more warm nut butter. Top with the second half of the batter and swirl peanut butter on top. this will give your brownies that rich peanut butter taste!
Add Some Nuts– Sometimes I swap the peanut butter chips for chopped nuts. Walnuts are my favorite, but chopped peanuts are delicious too.
Swap The Chocolate Chips– Dark chocolate chips, white chocolate chips or even yogurt-style chips can be swapped for chocolate chips or peanut butter chips.
Add Peanut Butter Cups- Peanut butter cups like Reeses can be chopped and added to the batter or sprinkled on top of this decadent recipe. You can also buy mini peanut butter cups which are delicious on top.
Why Do Homemade Brownies Not Always Cook In The Center?
Brownies should be a little gooey in the center, but not raw. Use a toothpick to see if they are done cooking. Keep in mind that brownies will continue cooking in the pan for a few minutes after ast they cool.
Also make sure to pick a spot in the center to test with your toothpick that isn’t covered in too much peanut butter. The peanut butter and the chocolate chips will both be melty in this recipe and the gooeyness can sometimes make it seem like they haven’t finished cooking when they have. We want moist crumbs and chewy brownies, not raw batter.
Should I Use A Metal Or Glass Baking Pan?
- Metal baking pans are great for brownies as they help to give the treat chewier edges with a gooey center. Metal pans heat up quickly but don’t hold in the heat for a long time. This allows those brownie edges to become chewier and sometimes slighty crisp. I recommend baking with a metal baking pan for brownies if you can.
- Glass backing pans take a little longer to heat up. You may find that your brownies take a few more extra minutes to finish cooking because the pan doesn’t warm as quickly. Glass pans hold on to the heat a little longer. The edges of the brownie tend to be a little less crisp and chewy, but will still make tasty peanut butter swirl brownies if you only have a glass pan.
How Do I Make These Brownies Chewier?
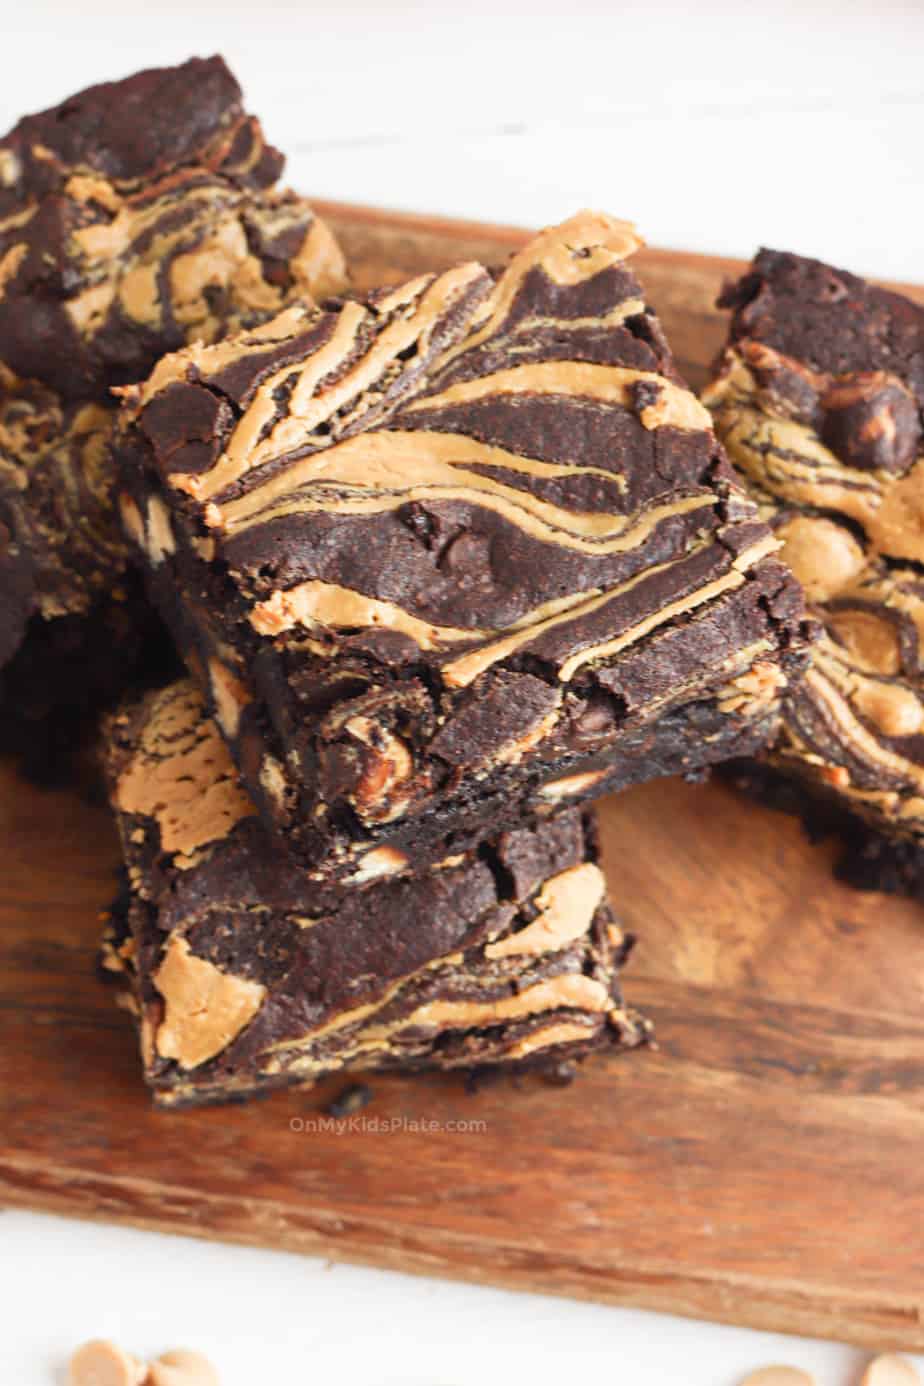
Some people like a really chewy brownie, but if you find your fudgy brownies aren’t quite chewy enough here are a few things you can try to take your brownies to the next level.
Start Checking The Brownies A Little Earlier– Start checking the brownies earlier and even consider underbaking them a little to make them fudgier and more chewy. Because they continue to cook as they cool, we can pull them out a little earlier for the perfect chewy peanut butter brownie. This doesn’t mean your brownies should be raw in the middle. It just means to start checking the center a little early so you can pull them out when they are at the perfect doneness.
Place The Brownies In The Fridge– Putting your brownies in the fridge can help them to be a little extra fudgier. It helps the more melted ingredients (such as chocolate chips, peanut butter and butter) firm up a little better.
How Long Should Brownies Cool Before Cutting The Brownies?
It is incredibly hard to resist cutting into a pan of gooey brownies, but it pays to be patient. Waiting thirty minutes before you cut into the brownies will mean your brownies will come out in more even pieces.
Hot, gooey brownies tend to fall apart, and they do cook a little more in the pan as they cool. This brownie recipe is loaded with peanut butter and chocolate, and you want to give your ingredients a chance to a little firm up a little before taking them out of the pan.
All that being said? Sometimes I can’t resist cutting them a little early too! It’s hard to let them cool completely, especially if you plan to top with vanilla ice cream!
How Do I Store These Brownies?
Store these brownies in an airtight container on the counter. The brownies will last 3-4 days and still taste fresh.
More Recipes For Brownie Fans

Gooey Chocolate Peanut Butter Brownies
Equipment
- 1 8-inch square pan you can use a 9 inch square pan, but the brownies will be thinner
- 1 parchment paper or a good baking spray or cooking spray can also work
- 1 Whisk
- 2 Small bowls
- 1 Large Mixing Bowl
- 1 Silicone spatula
- Measuring cups and spoons
Ingredients
- 1/2 cup butter 1 stick, melted
- 2 large eggs Large
- 1/2 cup brown sugar
- 1/2 cup sugar granulated
- 1 teaspoon vanilla extract
- 1/2 cup all purpose flour
- 1/2 cup cocoa powder unsweetened
- 1/2 cup chocolate chips
- 1/2 cup peanut butter chips
- 1/2 cup peanut butter creamy or crunchy
Instructions
- Preheat the oven to 350 degrees. Line the square pan with parchment paper or grease the pan well. Place the butter in a small bowl and heat for 30 seconds in the microwave.
- Crack the eggs to a large mixing bowl and whip with a whisk or fork until the yolks break. Add brown sugar, white sugar and vanilla to the bowl and mix well with a silicone spatula until combined. Pour the melted butter into the bowl with the wet ingredients and mix with a spatula until combined.
- Add flour and cocoa to the wet ingredients and mix with a silicone spatula until well combined. Watch to make sure all of the flour and cocoa dissolves into the wet ingredients, but don't overmix.
- Pour the chocolate chips and peanut butter chips into the batter and fold them in with a silicone spatula.
- Pour the brownie batter into the pan. Use your spatula to spread the batter evenly in the pan.
- Place the peanut butter in a small bowl and place in the microwave for 20 seconds, just enough to loosen it up a little bit. Dollop the peanut butter in large dollops all over the pan, I usually do about 9 dollops. Drag a knife or a chopstick through the batter and peanut butter to make the swirls but only a little! Less swirling produces better swirls than over-swirling.
- Bake brownies for about 25-27 minutes or until when you insert a toothpick in the center, the brownies are fudgy but not wet with batter. They are really fudgy and will be a little loose in the center. Allow the brownies to cool completely, then slice and enjoy!
Notes
Nutrition
Did You Make This?
I would love to see it! Share your thoughts with me in the comments below!



Sounds great. Can’t wait to try.