Homemade Pizza Dough
*This post may contain affiliate links. See our affiliate policy here.
This homemade pizza dough requires only a little hands on time. This recipe makes a delicious crust that you’ll want to sink your teeth into. Load it up with toppings or use it in your favorite recipes made with pizza dough! You can make this pizza dough ahead and store it in the refrigerator for a few days, then it’s ready when you are for delicious pizza. Homemade dough requires a little love, but isn’t hard to make.
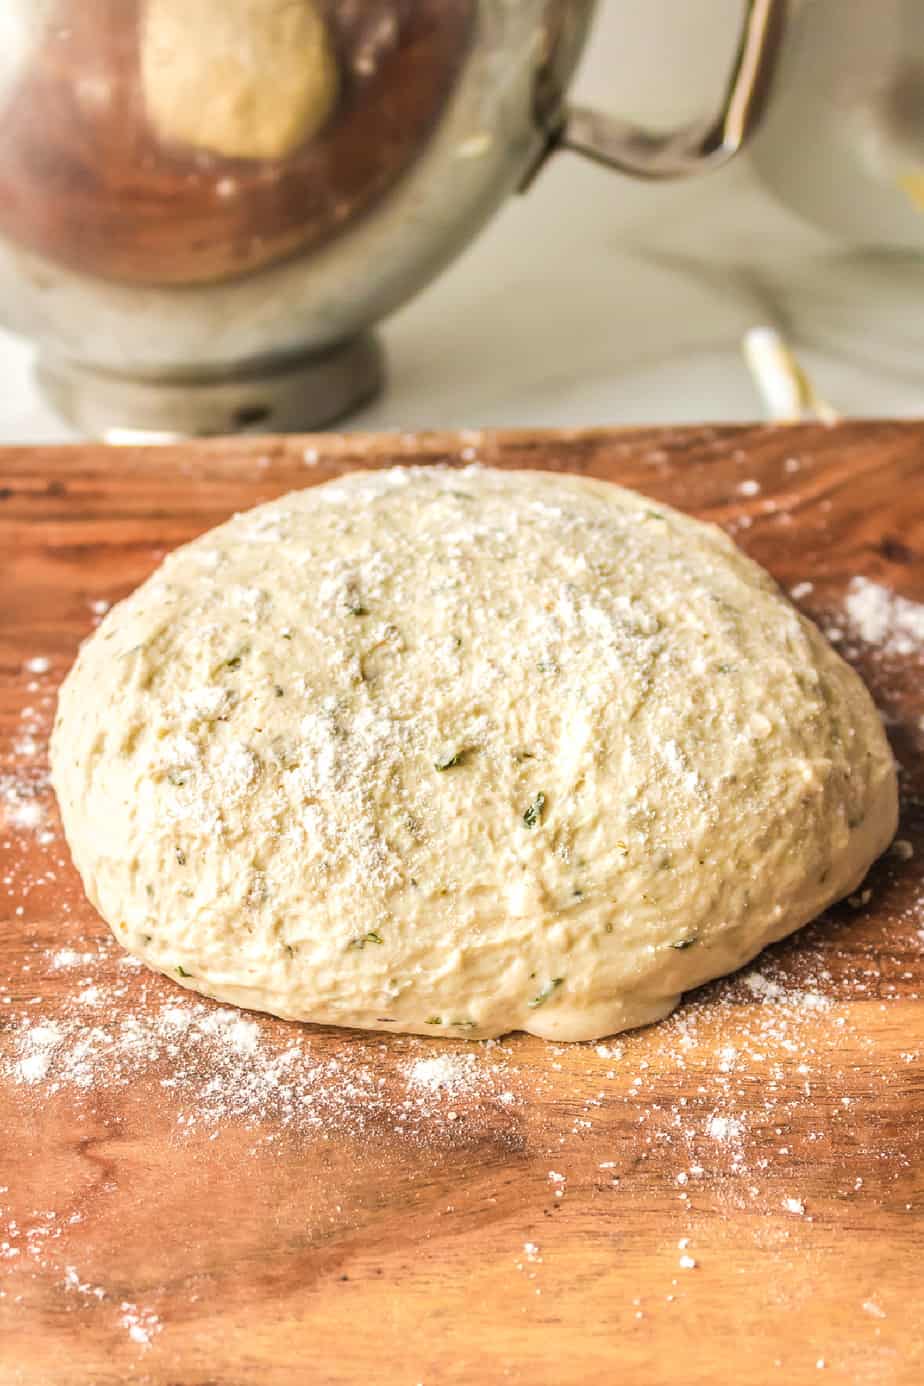
Table of Contents
Why We Love Pizza Dough
- Only A Few Ingredients– With only a few ingredients and a little bit of patience, you have a super delicious (and inexpensive) base to a delicious meal! Nothing beats fresh pizza dough for a delicious pizza.
- Use for many recipes! – Pizza dough can be used as the base for so many recipes! Whether you top it with tomato sauce, olive oil, use it to make a calzone, or stuff it with cheese and veggies, pizza crust is the base to so many delicious ideas.
- Everyone Loves Pizza! – I’ve found very few people who don’t enjoy a good slice of pizza or two for pizza night. It’s a recipe that pleases a crowd and is almost always a good idea.
I’ve mentioned a few times that I have Italian family, and that some of my family owns a pizza shop. When I was a kid it was always a fun weekend when I was able to go visit. I’m sure I was a big help at that age, but it sure was fun.
Ingredients For Homemade Pizza Dough
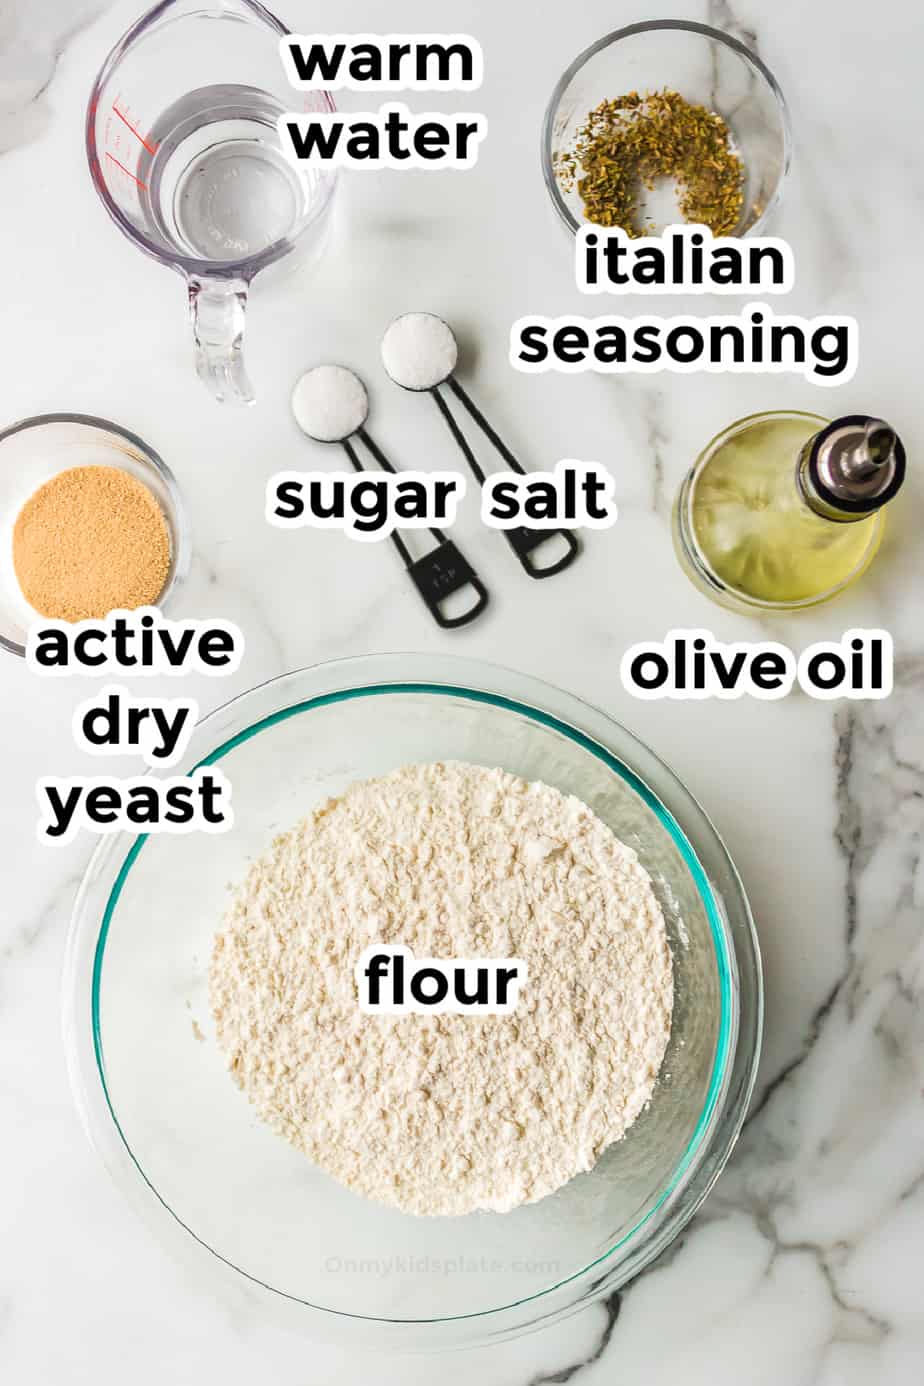
Find the full printable recipe with specific measurements and directions below in the recipe card.
- sugar
- lukewarm water divided, should be warm to the touch but not hot
- active dry yeast – At the grocery store yeast is often sold in packets that have the right amount of yeast. Active yeast is also usually the same as active dry yeast. See further down in the article for more information about instant yeast or rapid release yeast, but yes you can use them in this recipe.
- flour – regular all purpose flour works just fine, or you can use bread flour for an even chewier pizza dough
- salt
- Italian seasoning (optional) Since we’re making the dough homemade, we can add italian herbs for a pizza that’s even more flavorful! This can be left out if you prefer or are using this dough for a sweeter recipe. You can also use a mix of fresh herbs like basil, oregano or even rosemary and a good pinch of garlic powder.
- olive oil divided
- cornmeal (optional) a handul or two of cornmeal can be added to the pizza pan in place of oil. Not only does this keep the pizza from sticking to the pan, it also gives the pizza a crust that is both slightly crunchy and chewy on the bottom.
How To Make Homemade Pizza Dough
Proofing The Yeast
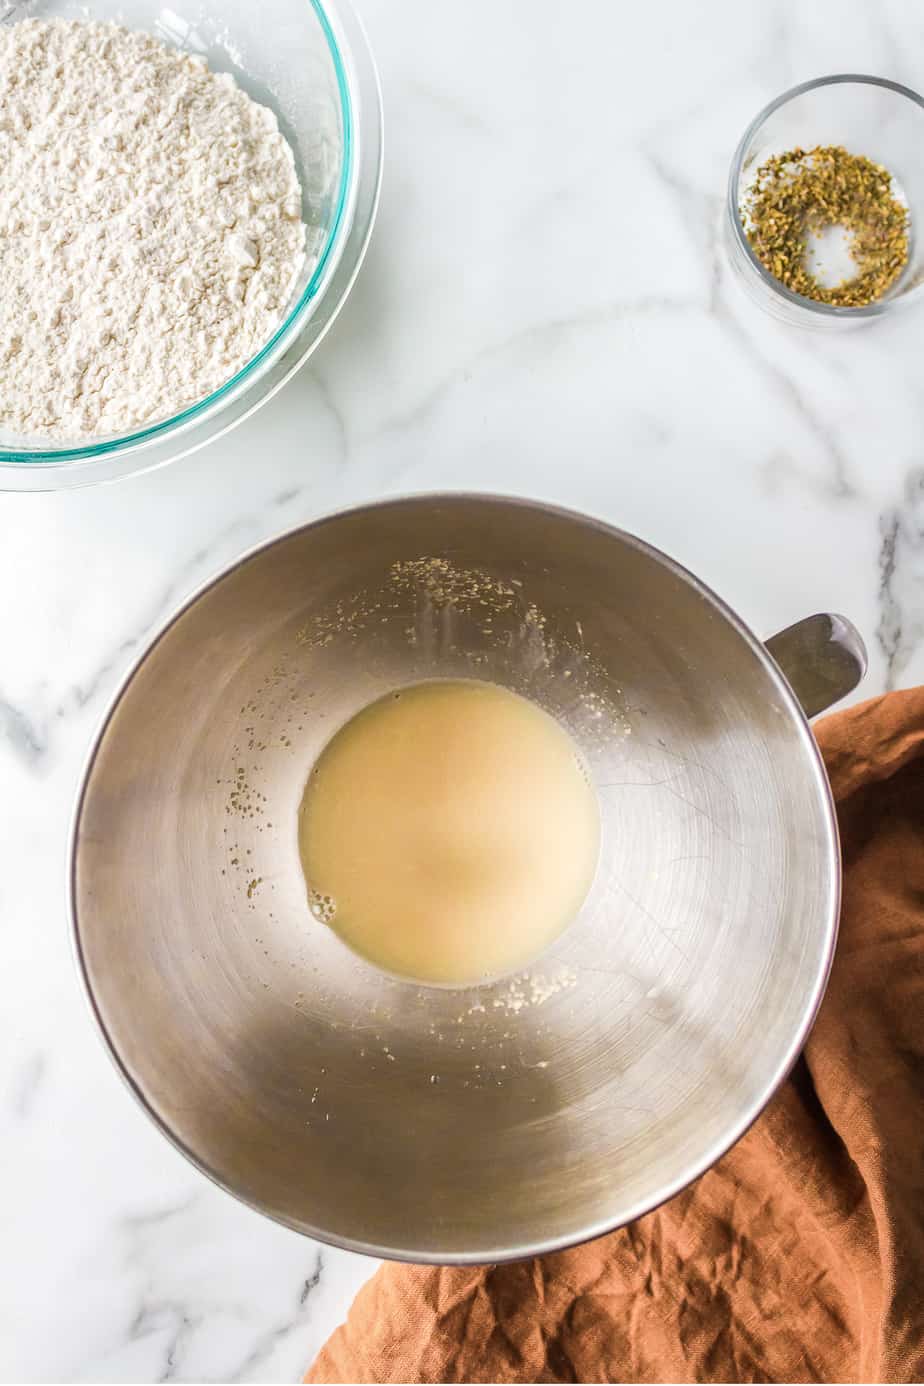
- In a bowl add the sugar, ½ cup of warm water and one packet of active dry yeast and stir. This can be done right in the bowl of a stand mixer or in a separate bowl. The water you use should be warm to the touch, but not super hot or you may kill the yeast.
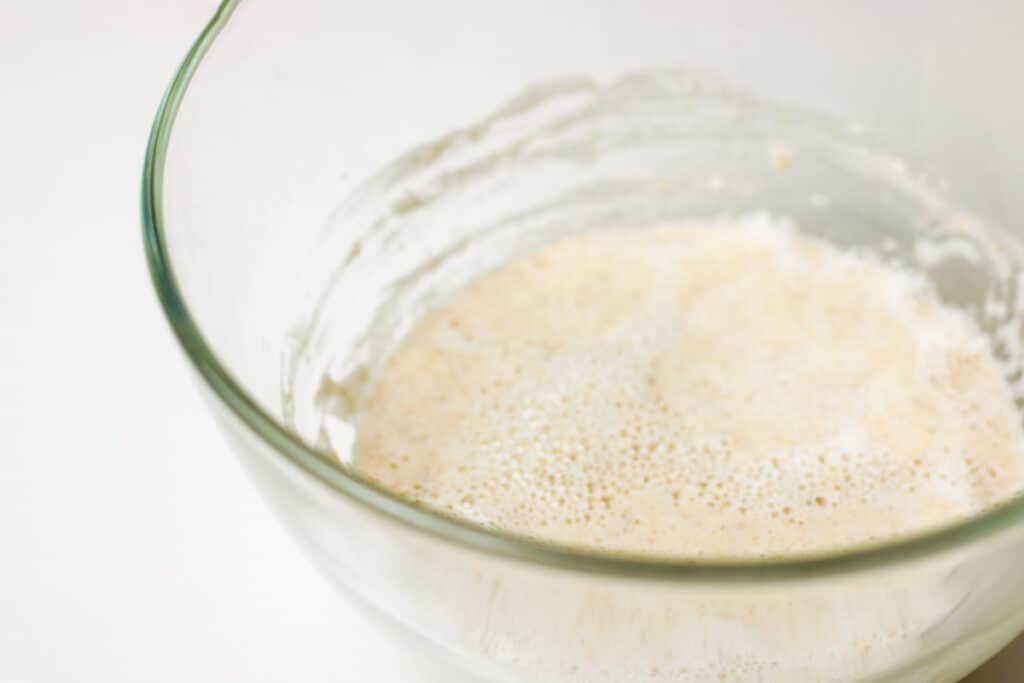
- Allow the yeast to set for 10 minutes. This is called proofing, and allows the yeast to begin to grow and expand. Your mixture should turn frothy looking on top, and should smell a bit earthy. If the yeast doesn’t have frothy bubbles on the top after 10 minutes, you may need to try again with new yeast. Below is a picture that’s more close up, you should start to see at least a few of those little bubbles on top of the mixture after ten minutes.
Mixing The Pizza Dough
- Mix together the flour, salt and Italian seasoning blend (optional) until combined, starting first at a low speed is the best way. Add the flour mixture to the yeast mixture. Add 3 tablespoons of the olive oil and an additional ½ cup of warm water on top to the dough mixture.
- Start the mixer or food processor with the dough hook or dough attachment. You can mix dough by hand but the easiest way is with a mixer or food processor because the stretchiness of the dough has to be developed it can take a while by hand.
- Mix until the flour combines, about a minute. Turn the speed up on the mixer to medium high and mix for a full five minutes. The dough should pull away from the bowl and be stretchy when you are done. See notes if mixing by hand.
Letting The Dough Rise
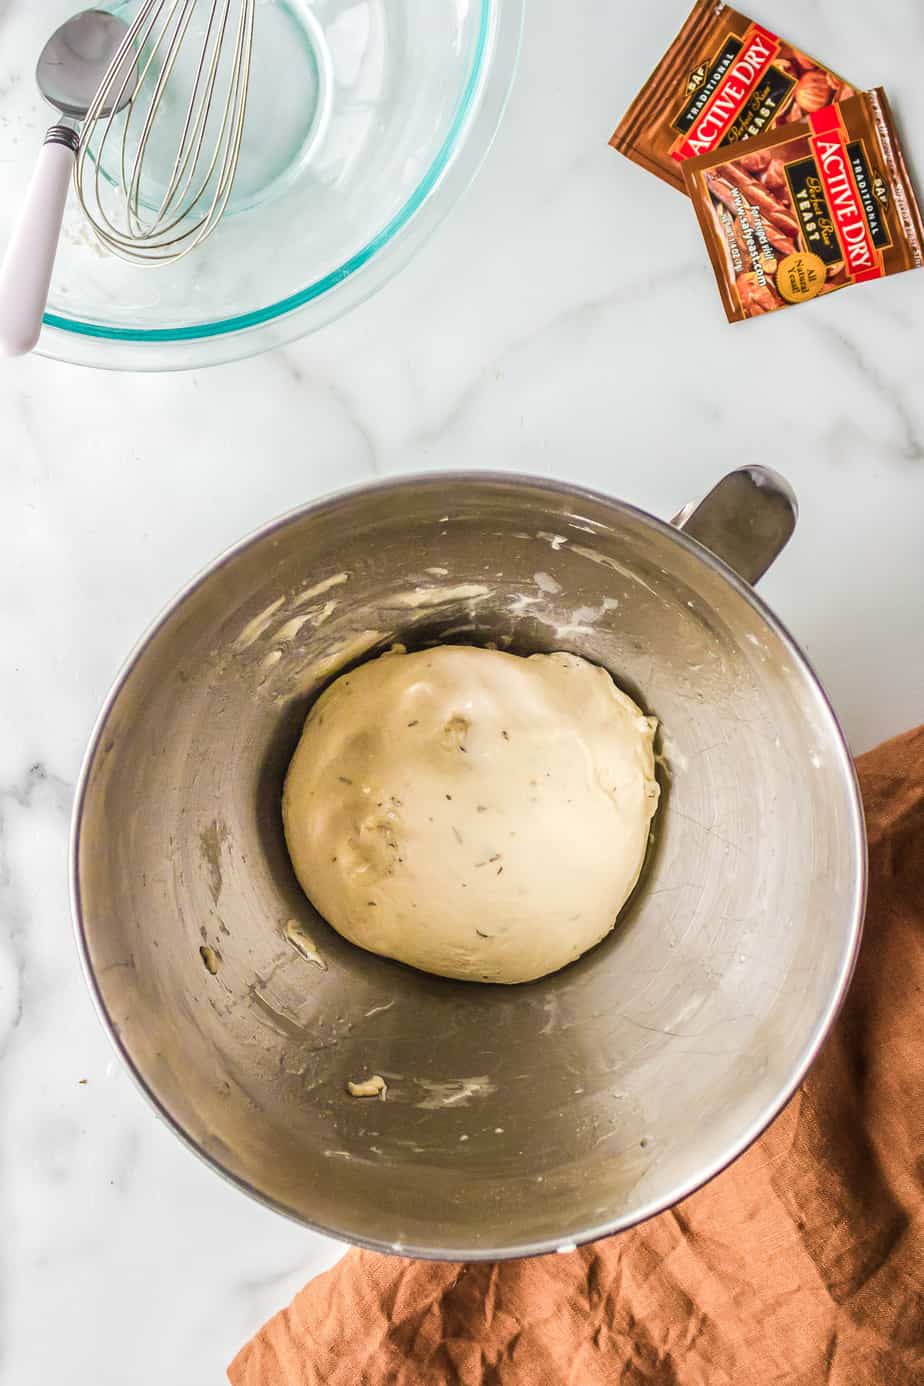
- Add a tablespoon of olive oil to a heatproof bowl. With a silicone brush, brush the oil in a thin layer all over the inside of the bowl. Transfer the dough to the bowl and cover with a clean kitchen towel. Place the dough in a warm place near the stove as it warms up. Allow it to rise for 30 minutes.
- After that 30 minute rise, you can cover with plastic wrap, place in an airtight container or put it in a zip top bag to store in the fridge. You can also continue on to cooking your pizza or other recipe.
Stretching The Dough
- If your pizza dough was in the refrigerator, let it come to room temperature before attempting to stretch it.
- Add a light handful of flour to a clean surface, your rolling pin, and a sprinkle of flour to the dough.
- Knead the dough just a few times by gently stretching the dough, folding it in half and then digging the heels of your hand into the dough. Just a couple of quick kneads will help you start stretching the dough and adding flour if it is too sticky.
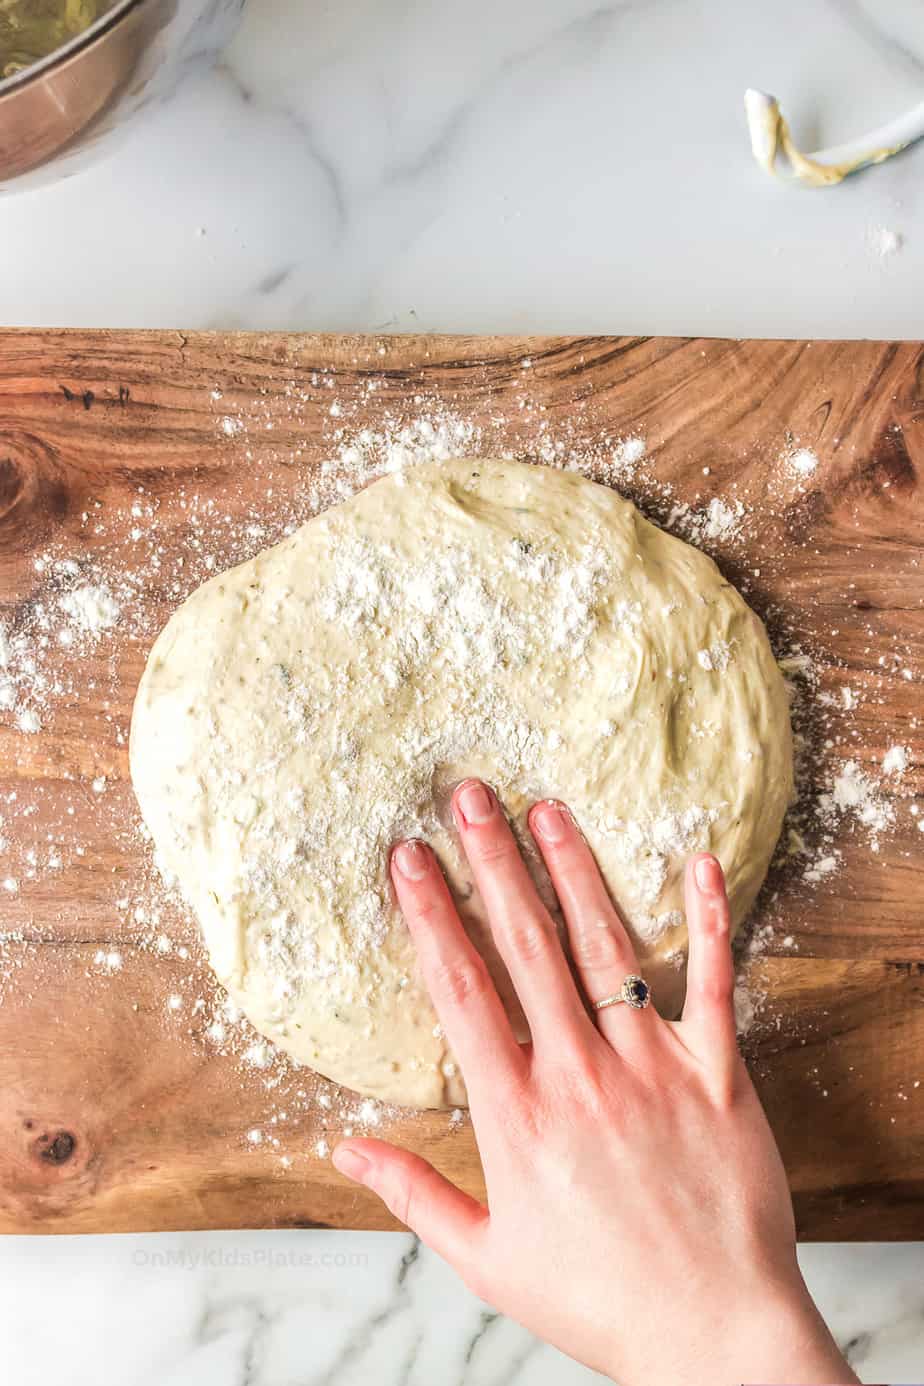
- Start rolling and stretching the dough to use with your favorite recipe.
To Make Pizza
- Preheat the oven to 450 degrees. Oil the pan or add a handful of cornmeal evenly to the pan for a crunchy bottom that doesn’t stick to the pan or spray the pan with nonstick spray.
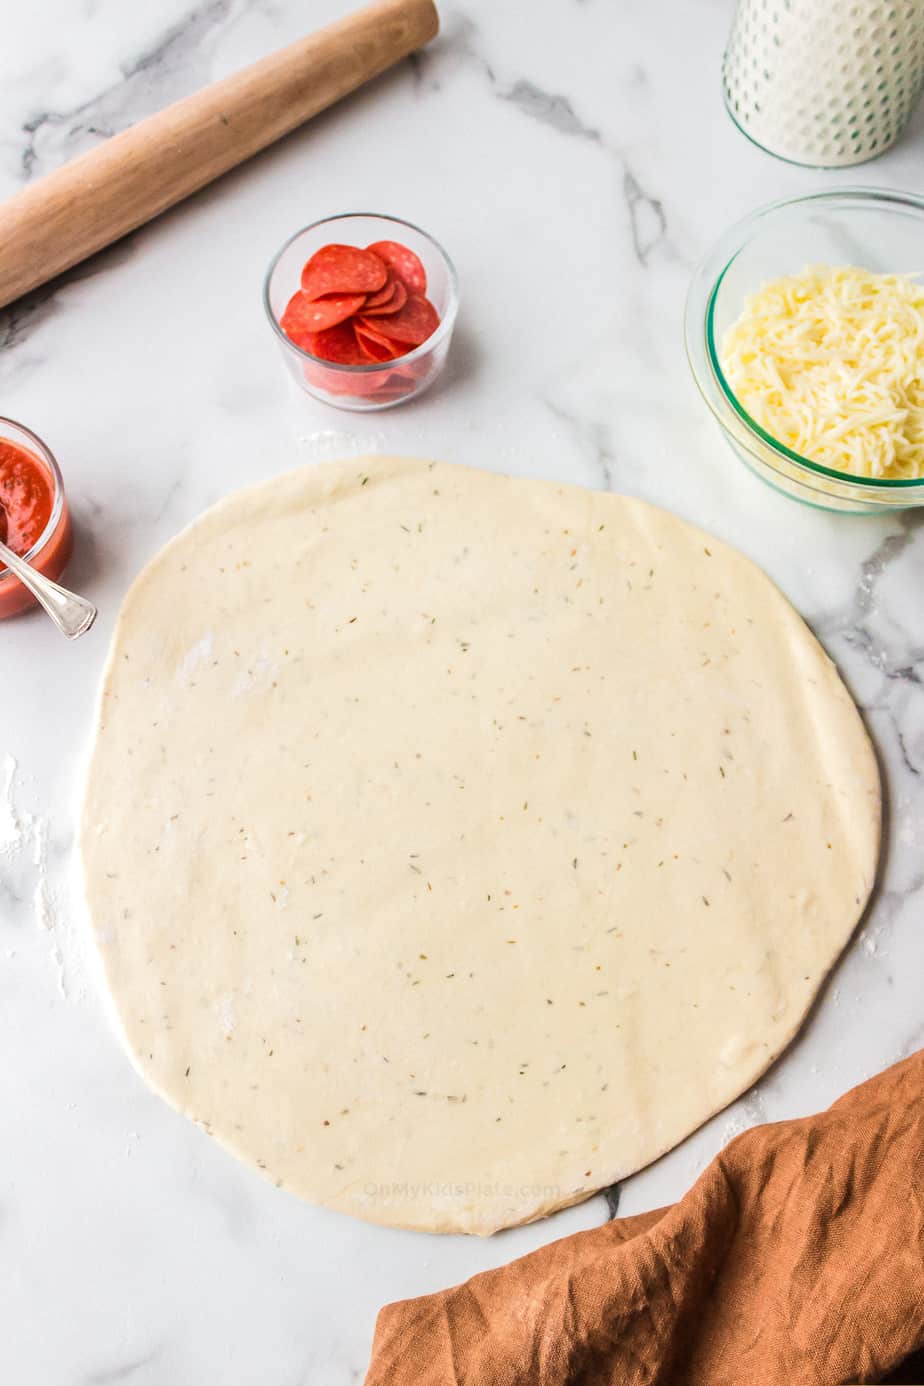
- With your hands or a floured rolling pin, begin to stretch the dough. Keep stretching the dough until it is about 12 inches across. If a hole develops you can pinch the dough back together, or even reroll it into a ball and try to stretch the dough again until you have a 12 inch wide circle.
- Cover with pizza sauce and your favorite toppings, then bake for 10-12 minutes or until the pizza is golden brown on the outside and fully cooked in the center.
You can also use my full directions for making Homemade Pepperoni Pizza here.
How Do I Knead Pizza Dough?
Knead the dough just a few times by gently stretching the ball of dough. Folding it in half and then dig the heels of your hand into the dough, then repeat.
Sometimes people are hesitant to dig in, but with pizza dough this kneading process is important.
When you combine the ingredients for pizza dough you are creating a chemical reaction with the yeast. Kneading the dough then causes the gluten in the dough to become stretchy. This makes a pizza dough that stretches without breaking and a chewier pizza.
How Do I Know If My Pizza Dough Has Been Kneaded Enough?
These are a couple things that can help you determine if your pizza dough has been kneaded enough.
- Pizza dough will be smooth– When the dough is stretchy enough the top of the dough will look smooth but also will still be slightly tacky to the touch.
- Poke it! – Another way to check your dough is to poke it gently! If the dough bounces back it is usually ready if it is also a smooth dough.
How Long Does Pizza Dough Last In The Fridge?
Pizza dough will typically last for about three days in the fridge but can sometimes last as long as a five day shelf life when refrigerated. The pizza dough is the best quality if you use it within 48 hours.
Store pizza dough tightly wrapped in saran wrap or in an airtight container to keep it fresh and from drying out.
You can tell if pizza dough has gone bad if it feels dry, if the texture seems really off and is not stretchy, or if the dough itself has started to turn a grey color instead of a beige-brown or white color.
Signs Your Pizza Dough Is Bad
These are obvious signs of bacterial growth and the dough should be thrown away.
- You can tell if pizza dough has gone bad if it feels dry or if the texture seems really off and is not stretchy.
- If the dough itself has started to turn a grey color instead of a beige-brown it may bad.
- Or if the dough has whiteish spots that are not flour.
Your Pizza Dough May Go Bad If… What To Avoid!
It’s a sad day to let pizza dough go bad, but here are a few reasons to avoid of why your homemade dough may have gone bad.
- Your yeast is bad or expired so it won’t rise
- You killed the yeast by making the water too hot or used cold water and it couldn’t rise. The water should be warm to the touch but not hot.
- You left the pizza dough in the fridge for more than three days or it developed whitish spots that are not flour.
- You didn’t cover the pizza dough tightly and it dried out
Commercial pizza dough often has other additives and preservatives that can make it last longer. This is why the manufacture date is sometimes longer than fresh dough.
Can I Freeze Pizza Dough?
Yes you can place this pizza dough recipe in a freezer bag to avoid freezer burn (or visible freezer crystals) for up to three months. Beyond three months you risk killing the yeast and the dough may not rise. Allow the pizza dough to fully defrost and come to room temperature before attempting to stretch it.
Once pizza dough has been frozen and defrosted you can not refreeze it a second time, the dough will not cook properly as this can destroy the fermentation process (which is what causes the pizza to rise and be stretchy.)
Can I Substitute Rapid Yeast Or Instant Yeast For Active Dry Yeast?
Yes, you can substitute with instant yeast in this recipe interchangeably. Not all baking recipes can you substitute one for one, but you can sub substitute for this pizza dough. Find out more about the differences between different kinds of yeast here.
Why Is There So Much Cornmeal Added To The Pan?
I’ve had a few people tell me I use too much cornmeal for the pan. There will be some excess on the pan afterward. The cornmeal not only coats the bottom of the pizza for a delicious crust but also the excess cornmeal helps keep the dough from sticking to the pan. When making pizza at home I honestly just throw a handful of cornmeal onto the pan and it works every time. When I measured what I usually add it was about 1/4 cup.
How Much Dough Do I Need?
This recipe makes enough dough for one 12 inch pizza. If you are trying to cover an entire sheet pan I recommend doubling the dough recipe.
What Can I Do With Leftover Pizza Dough?
You can use extra dough by rolling it into small dough balls. Then stuff the dough with a filling such as cheese, pepperoni or your favorite pizza toppings.
I used to play with leftover pizza dough like playdough when I was a kid at my family’s pizza shop. My uncles would bake the shapes for me in the hot pizza oven. Then I would dip them in tomato sauce which was way fun as a kid.
Recipe was delicious! Crust came out perfectly!
Kristen- OMKP Reader
What Other Recipes Can I Use Homemade Pizza Dough With?
Most recipes that use a crescent dough can also be made with pizza dough. Here are a few of my favorite recipes this pizza dough is good for.
Easy Homemade Pepperoni Rolls– Like a pepperoni pizza, but dippable! These delicious pepperoni rolls are perfect for lunch, dinner or an appetizer. Instructions for the air fryer and the oven.
Cold Veggie Pizza- I’ve made this one into a Christmas Tree Shape with the toppings, but this classic recipe can easily be made using pizza dough too. This makes a great side or appetizer at a party!
Apple Crisp Dessert Pizza– While this recipe includes a two-ingredient dough, it would be delicious with this pizza dough too. Leave out the optional Italian seasoning in the dough for this gooey apple dessert pizza!
Thanksgiving Leftovers Pizza– Wow, you can put Thanksgiving leftovers on a PIZZA! You can, and it’s delicious. I think my family might even Thanksgiving more on leftover night and yours will too!

Homemade Pizza Dough
Ingredients
- 1 teaspoon sugar
- 1 cup warm water divided, should be warm to the touch but not hot
- 2 1/4 teaspoons active dry yeast one packet
- 2 ½ cups flour
- 1 teaspoon salt
- 1 tablespoon Italian seasoning optional
- 4 tablespoons olive oil divided
- 1/4 cup cornmeal optional
Instructions
Proofing The Yeast
- In a bowl add the sugar, ½ cup of warm water and one packet of active dry yeast and stir. This can be done right in the base of a stand mixer or in a separate bowl. The water you use should be warm to the touch, but not super hot or you may kill the yeast.
- Allow the yeast to set for 10 minutes. This is called proofing, and allows the yeast to begin to grow and expand. Your mixture should turn frothy looking on top, and should smell a bit earthy. If the yeast doesn’t have frothy bubbles on the top after 10 minutes, you may need to try again with new yeast.
Mixing The Pizza Dough
- Mix together the flour, salt and Italian seasoning blend (optional) until combined. Add the flour mixture to the yeast mixture. Add 3 tablespoons of the olive oil and an additional ½ cup of warm water on top to the dough mixture.
- Start the mixer or food processor with the dough attachment. Mix until the flour combines, about a minute. Turn the speed up on the mixer to medium high and mix for a full five minutes. The dough should pull away from the bowl and be stretchy when you are done. See notes if mixing by hand.
Letting The Dough Rise
- Add a tablespoon of olive oil to a heatproof bowl. With a silicone brush, brush the oil in a thin layer all over the inside of the bowl. Transfer the dough to the bowl and cover with a clean kitchen towel. Place the dough in a warm place near the stove as it warms up, and allow it to rise for 30 minutes.
Stretching The Dough
- Add a light handful of flour to a clean surfacem your rolling pin, and a sprinkle of flour to the dough. Kneed the dough just a few times by gently stretching the dough, folding it in half and then digging the heels of your hand into the dough. Just a couple of quick kneads will help you start stretching the dough and adding flour if it is too sticky. Then start rolling and streching the dough to use with your favorite recipe.
To Make Pizza
- Preheat the oven to 450 degrees. Oil the pan or add a handful of cornmeal evenly to the pan for a crunchy bottom that doesn't stick to the pan.
- With your hands or a floured rolling pin, begin to stretch the dough. Keep stretching the dough until it is about 12 inches across. If a hole develops you can pinch the dough back together, or even reroll it into a ball and try to stretch the dough again until you have a 12 inch wide circle.
- Cover with toppings then bake for 10-12 minutes or until the pizza is golden brown on the outside and fully cooked in the center.
Notes
- This recipe makes one 12 inch pizza but can also be used for a variety of recipes. Once you’ve made the dough you can follow my instructions for making homemade pepperoni pizza here.
- If you are unsure about the temperature of your water, think of the water being about the same temperature as a warm bath when you touch it. If you’re checking your water with a thermometer, it should be about 110 degrees.
- If you don’t have a stand mixer or food processor with a dough attachment, you can mix the dough by hand but it takes longer. Expect when mixing in the flour mixture into the dough to knead the dough for at least five to seven minutes. This ensures that the flour is fully combined and the dough becomes stretchy and elastic. If the dough feels too sticky after kneading for several minutes you can add a little more flour, usually between a teaspoon and a tablespoon at a time.
- When you’re letting the dough rise, if you are mixing in a stand mixer you can let the dough rise right in the bowl. Remove the pizza dough from the stand mixer after mixing, oil the bowl with olive oil, then add the dough back to the bowl. Cover with a kitchen towel and let the dough rise in a warm place for 30 minutes.
- After that 30 minute rise, you can cover with plastic wrap or put it in a zip top bag to store in the fridge if you are prepping ahead.
- I don’t recommend cooking on parchment paper for this recipe. This pizza cooks at 450 degrees, and most parchment paper is safe to cook with up to 425 degrees.
- You can add a handful of cornmeal to a pan making oil unnecessary, or oil the pan using a high-temperature oil like canola oil, avocado oil or sunflower oil.
Nutrition
Did You Make This?
I would love to see it! Share your thoughts with me in the comments below!






I made this recipe, but I only used a tablespoon of the olive oil, to grease the bowl and the pan. I also used the corn meal sprinkled on the greased pan. You can get by with less cornmeal. I lightly sprinkled mine, approximately a couple of tablespoons. Baked it at 425 degrees for 20minutes.
Is this right measurements? 1 cup of water to 2 1/2 cups flour? Mine looked like pancake batter!
This is the right measurement. Is it possible the yeast wasn’t actually alive? You do need to knead the dough also to get the flour to finish working into and absorbing the liquid, and then a little longer for the stretchiness to develop. -Kristy
Can I use a bread machine to make this dough?
I have not made this in the bread machine before, but I bet you could use the dough setting to mix it. I would bake it in the oven though 🙂 Let me know how it goes!
does altitude, i’m over 5k feet, have an impact on the rise? i’ve made this recipe a couple of times. it seems to me that i don’t get much of a rise.
Hi Ron- Altitude can impact rise quite a bit. I am at about 5000 feet myself, but often have recipes tested at sea level for me as well (including this pizza dough.) What happens at higher altitudes is because of the thinner air at higher altitudes, things rise a little faster but the structure doesn’t always have the time to build. Kind of like building a house with only half of a foundation. Since the base is then not as strong, the structure will then collapse in on itself. As it rises too quickly, it can also cause baked goods to dry out.
Depending on how high over 5000 feet you are will depend on how much you have to adjust. I adjust the yeast/baking powder/baking soda in a recpe typically about 25% less at 5000 feet here in Arizona. This slows down the rise and allows the structure time to build the base. If you are higher then 5000 feet it may be different how much you have to adjust for where you live. About 5000 feet is when you typically start to see things really impacted in baking. Here is some more great information about what to try adjusting for where you are: https://www.kingarthurbaking.com/learn/resources/high-altitude-baking
Also I’d check the yeast when you first start, which is why we proof the yeast in warm water with sugar to get it started in this recipe. If the yeast is older or just not alive anymore this will also effect your final results a lot. I carefully store yeast in my home in an area that doesn’t get too hot, as too much heat can slowly destroy the yeast and I live in Arizona. Here’s more info: https://www.allrecipes.com/article/how-to-store-yeast/
Hope that helps you to have an even more delicious pizza! -Kristy
Hi Kristy
This has become my go to pizza dough. I admit I have tried about 20 different recipes and this definitely the absolute best recipe ever!
I plan to make several pizzas, so want to make the dough the day before and refrigerate for easy preparation. I have a few questions:
If I was to double the recipe does that change the knead time in my stand-up mixer?
To store a single recipe in the fridge in an air tight container – what size of container should I use, 4 cup or 6 cup?
If I store a single recipe in an ziplock freezer bag how do I prevent the dough from sticking to the bag when I remove it.
Thanks again for sharing such a wonderful recipe.
Linda
I’ve made this in the past and loved it! I wonder how it would respond with pizza yeast (requires no rise time) instead of active dry?
Hi Kristya, I’m sure you could make this with the pizza yeast instead, you should be able to skip proofing the yeast assuming you have fresh pizza yeast. Let me know if you try it, so glad you love the recipe! -Kristy
Will the outcome be different if a pizza stone is used instead of a pan?
Pizza stones mimic more of a brick oven, allowing you to cook at high heat evenly. A pizza stone will give your pizza dough a crust you simply can’t get on a pan. I’d watch the timing a little earlier, you might find it cooks quicker. I also would recommend throwing a handful of cornmeal onto the pizza stone right before you slide the dough on, as it can help ensure the pizza doesn’t accidentally stick to the stone when you are peeling it off and on. Pizza stones should also be warmed up in the oven while it’s preheating if you’ve never used one before. Otherwise enjoy, this recipe will be delicious baked on a pizza stone! Let me know how it goes!
Can this be made with gluten free flour? Would any adjustments be necessary?
Gluten is what makes pizza dough and bread stretchy and chewy. While gluten-free options can easily be substituted in something like breading a chicken breast, pizza dough uses yeast so the process is a little different. I recommend finding a recipe for pizza dough that is already adapted to be gluten-free. Switching over a dough or bread recipe with a swap or two simply won’t get you the same results without making more adjustments, trial and error. Sorry! -Kristy
Hello, can this recipe be made using a bread machine?
Hi Koni, I have not made this recipe in the bread machine but I see no reason why it wouldn’t work on the dough setting for most machines. I’d make sure you follow the instructions for your machine about the order in which to add ingredients. Let me know if you try it how it goes! -Kristy
Can this dough be cooked in an air fryer?
I’m sure it can, I have not tried it as a full pizza though Marty. It works great for these pepperoni rolls in the air fryer though. https://onmykidsplate.com/pepperoni-rolls/ Let me know if you try it as a full pizza! -Kristy
This is by far the easiest dough that I have ever made! It rolled out so easy too!
Thanks so much Pattie, I’m so glad you loved the recipe and it made a delicious pizza! I would love if you could leave a star rating too, it helps others find the recipe. Hope you make more pizzas! -Kristy
Can you use bread flour for this recipe?
Hi Kristin, I have not tried this recipe with bread flour. Usually, bread flour in a recipe like this should be fine, however sometimes bread flour can be drying because it has more protein than all-purpose flour. If it were me trying it, I would add an extra half tablespoon of oil to the dough to counteract the possible drying. If you decide to try it, let me know how it goes! -Kristy
If I put the dough in the refrigerator for 24-48 hours will it taste better once bakes?
Hi Phyllis, No sorry, the flavor of the dough won’t change from refrigeration for this recipe. You can refrigerate it though if you want to make it later to make prep easier. -Kristy
I just made this pizza dough , i threw all my other recipes out this is the most amazing recipe, i made a double batch, it made 2 xl pizza, amazing .
So glad you love the recipe Sue, thanks so much for your note! -Kristy
Can you freeze this dough?
Hi Amy, Yes you can freeze this dough for up to three months. More than that and you risk possibly destroying the yeast. Defrost completely in the fridge the night before, it usually takes 8-12 hours. It helps to lightly dust the dough with flour or oil the container you are defrosting the dough in so it doesn’t stick to the container. Hope that helps! -Kristy
This is the best pizza dough! I’m not some one who makes pies or bread so I was so pleased to be able to actually make the pizza that turned out! Thanks! Marilyn 🥰🍕
So glad the pizza was delicious Marilyn! -Kristy