
How To Make Easy Stained Glass Cookies
*This post may contain affiliate links. See our affiliate policy here.

Stained glass cookies start as a buttery sugar cookie, but with a little holiday magic to make the center of the cookie see-thru with sweet candy. This cookie is perfect for a cookie platter, cookie exchange or just delicious holiday baking!

Why We Love Stained Glass Cookies
- Soft, Pretty Cookie – This cookie takes my soft no spread cutout sugar cookie recipe and gives it a twist with the colorful center that looks really pretty on cookie platters.
- Chewy Fruity Center – Many of the stained glass cookies use a hard candy to make the transparent part but I’ve found that it really hurts your teeth. This stained glass cookie recipe has a pretty transparent center cut into festive shapes. The center is chewy and fruity, and looks like stained glass windows.
- Fun To Make For Kids And Adults – Stained glass sugar cookies are fun for kids to make with you. These stained glass cookies are sure to impress the kids and will be the star of the cookie tray this year.
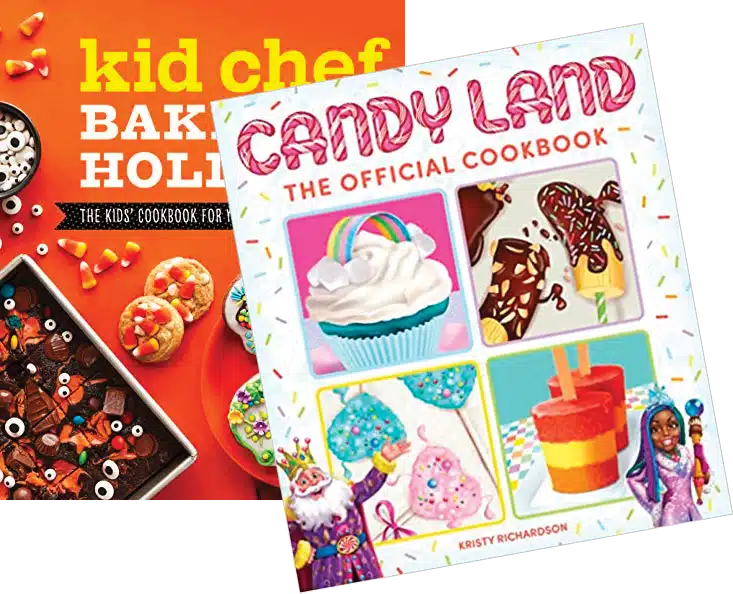
This recipe is a sample recipe from my first cookbook, Kid Chef Bakes For The Holidays and is so fun to make!
Ingredients For Stained Glass Cookies

Find the full printable recipe with specific measurements and directions below in the recipe card.
- cold butter – unsalted
- white sugar
- eggs
- vanilla
- salt
- flour – all purpose flour
- gummy bears gummy worms or other gummy candy works too.
How To Make Stained Glass Cookies
- Preheat the oven to 350˚F. Lay parchment paper on your cookie sheets and clean off a nice big area of counter space to roll out the cookie dough.
- In a large bowl, cream the butter and sugar together in a mashing motion by hand or for 2 to 3 minutes with an electric mixer on low-medium.

- Separate an egg and drop the whites in one bowl and the yolk in a second bowl. In the bowl with the yolk, crack and add a second full egg and vanilla, then beat with a fork or whisk. Add the egg mixture to your sugar and butter and mix until well blended.


- To your wet mixture add the flour and scatter the salt around the bowl. Mix well for a few minutes with a spatula or a stand mixer on low until a dough forms. (Don’t try mixing this part of the dough with a hand mixer—the dough is very thick and may break your mixer!)
- Roll out the cookie dough to a thickness of about ⅜ of an inch onto a floured surface. You can also roll out the dough onto a silicone baking mat. Use a 3-inch cookie cutter and cut circles out of your dough.

- In the center of each circle, use a small holiday cookie cutter that is 1 ½ to 2 inches and cut a smaller shape out of the center of each cookie. Take a small piece of dough about the size of a large bean and roll it into a ball, then flatten it and press it at the top of your circle for the Christmas tree ornament.
You could cut a small hole with a wooden skewer through the top of the ornament. When the cookies are cool you could add a small thin piece of red string licorice through the hole as the ribbon to hand the ornament. While this does look really cute, I find making the hole at the top can be a little finicky so I usually skip this detail.

- Re-roll any extra dough to cut more cookies and place on the prepared baking sheets. Bake cookies in the oven for 9 to 11 minutes until they are almost done but still have a light color.
- Slice your gummy candies into the smallest pieces you can into pieces just a little bigger than a large sprinkle. While the cookies are still hot on the pan, sprinkle the gummy bits into the center of the cookies. Put the cookies back in the oven for 1 to 2 minutes to melt the gummies.

- Use a toothpick to pull the gummy candy to fill in any holes while the cookies are still warm. Once the pan has cooled for a few minutes, put the cookie sheet in the fridge for about 5 minutes to fully set the gummies. Then enjoy when the cookies cool completely.

Kid Chef Bakes For The Holidays is packed full of holiday recipes created for aspiring bakers who are 8-12. It’s such a fun cookbook, and makes a great gift. You can see more recipes featured in Kid Chef Bakes For The Holidays cookbook around the website, like the Blueberry Galettes (mini pies!), the Raspberry Cupcakes and one of my personal favorites, the Chocolate Whoopie pies.

What Kind Of Cookie Cutters Do I Need?
For the outside of the cookie, you need a round 3-inch cookie cutter like this one. I like this set because it has a round side and a fun scalloped side of the cookie cutter.
You can also use a glass that is three inches across if you don’t have a round cookie cutter that’s the right size.
For the insides of the cookies, you’ll need a smaller cookie cutter that’s around 1 1/2 to 2 inches.
- Holiday Small Cookie Cutters– I have this set and it’s great!
- Small Shapes Cookie Cutter Set- This set is great for this cookie, and also for making fancy pies crusts.

What Gummy Candies Do You Use In The Center?
You can use many different kinds of gummy candy in the center of these sugar cookies. Gummy bears, gummy worms, or any gummy candy that’s kind of see-through.
If you use a gummy candy that you can’t see light through that’s more like a gumdrop, you will have pretty colors in the center but you will lose that stained glass effect.
I have not tried sour gummy candy before, like sour patch kids. If you try them, let me know in the comments!
I have seen other stained glass cookies that use chopped hard candies like Jolly Ranchers in the center. While the chopped candies once melted look beautiful, I prefer using gummies because they are not as hard on your teeth. Hard candies make a really hard center.
Making These As Christmas Cookie Gifts?
My simplified White Chocolate Peppermint Bark makes a great holiday gift too, and it’s super easy to make. Or try making these super fun Christmas hot cocoa bombs, they make a delicious gift by themselves or paired with my chocolate peppermint thumbprint cookies.
How Do I Make The Gummy Centers?
The trick to making the festive gummy centers is to chop the gummy bears or other gummy candies into really small pieces so they melt quickly and evenly. This melts the center of cookies without overbaking the sugar cookie part.
I slice the gummy bears longways both directions, and then slice into about either pieces from there. This makes gummy bear pieces that are only a little larger than a sprinkle. The smaller you can slice the gummy bears, the easier it is for them to melt together.
It is great to separate the candy by color as you slice the gummies so you can do both solid color and multi-color centers in your cookies. Use all of a single-color gummy or mix the colored gummy pieces for a rainbow swirl look.
After the cookies have mostly finished baking, you sprinkle the gummies in the center of the cookie. Then pop back in the oven for 1-2 minutes to melt. Let the candy cool for a few minutes, then pop the tray in the fridge to finish chilling and setting the gummies.
How Do I Fix Holes Between The Gummy Pieces After Melting?
Don’t worry! It’s normal to have a few holes here and there as the gummies don’t always melt perfectly every time. Here’s what you do.
While the gummies are still hot from the oven you can fix the holes. Take a toothpick and pull the warm gummies over the holes. Then chill the cookies in the fridge to set them. Once cool they are ready to add to the cookie tray.

How Do I Store Stained Glass Window Cookies?
If you store these cookies in a sealed container, the gummies stay soft in the center. If you store these cookies in the refrigerator the centers become harder.
I recommend that you store in an airtight container on the counter after you allow the cookies to cool. Once they cool completely, the cookies will also easily stack without the candy centers sticking together.
Expect cookies will taste their freshest if eaten within 3 days.
More Holiday Cookie Recipes

Peppermint Candy Cane Cookies


Christmas Tree Meringue Cookies

Raspberry Thumbprint Cookies


Stained Glass Cookies
Equipment
- Cookie sheets
- Large Mixing Bowl
- Electric mixer or stand mixer (optional)
- 2 small bowls
- Medium mixing bowl
- Fork or whisk
- Rolling pin
- 3-inch round cookie cutter
- 1 ½- to 2-inch cookie cutters in holiday shapes
- Small sharp knife
Ingredients
- ¾ cup butter cold, unsalted
- ¾ cup white sugar
- 2 eggs one whole egg and one egg yolk needed
- ½ teaspoon vanilla
- ½ teaspoon salt
- 2 ¼ cups flour all purpose
- 8 ounces gummy bears gummy worms work too!
Instructions
- Preheat the oven to 350˚F. Lay parchment paper on your cookie sheets and clean off a nice big area of counter space to roll out the cookie dough.
- In a large mixing bowl, cream the butter and sugar together in a mashing motion by hand or for 2 to 3 minutes with an electric mixer on low-medium.
- Separate an egg and drop the whites in one bowl and the yolk in a second bowl. In the bowl with the yolk, crack and add a second full egg and vanilla, then beat with a fork or whisk. Add the egg mixture to your sugar and butter and mix until well blended.
- To your wet mixture add the flour and scatter the salt around the bowl. Mix well for a few minutes with a spatula or a stand mixer on low until a dough forms. (Don’t try mixing this part of the dough with a hand mixer—the dough is very thick and may break your mixer!)
- Flour the counter and roll out your dough to a thickness of about ⅜ of an inch. Use a 3-inch cookie cutter and cut circles out of your dough.
- In the center of each circle, use a small holiday cookie cutter that is 1 ½ to 2 inches and cut the center out of each cookie. Take a small piece of dough about the size of a large bean and roll it into a ball, then flatten it and press it at the top of your circle for the Christmas tree ornament.
- Reroll any extra dough to cut more cookies and place on the prepared baking sheets. Bake the cookies in the oven for 9 to 11 minutes until they are almost done but still have a light color.
- Slice your gummy candies into the smallest pieces you can into pieces just a little bigger than a large sprinkle. While the cookies are still hot on the pan, sprinkle the gummy bits into the center of the cookies. Put the cookies back in the oven for 1 to 2 minutes to melt the gummies.
- Use a toothpick to pull the gummy candy to fill in any holes while the cookies are still warm. Once the pan has cooled for a few minutes, put the cookie sheet in the fridge for about 5 minutes to fully set the gummies.
Notes
Nutrition
Did You Make This?
I would love to see it! Share your thoughts with me in the comments below!


Thank YOU.! I love this idea!!
You are very welcome Kirsten, hope you enjoy them! They are SO fun to make!
Absolutely perfect! 10/10! My daughter had seen an idea like this in a book and begged me to make some with her. I was hoping this recipe would work well and it did not disappoint! Thank you for sharing; we have already decided it will become a Christmas tradition for us.
Thanks so much Laura, I am so happy you and your daughter had fun! I’m so honored to have this recipe be a part of your holiday traditions. Merry Christmas!
Just making these now. Your instructions are confusing. How do you have cold softened butter? Either cold or room temperature softened.
Hi Coleen, I edited the instructions. You need to use cold butter for this recipe, working it into the flour. The ratio of the cold butter and flour combined is what allows these sugar cookies to hold their shape when you cut them out. Hope that helps.
Have you ever tried to freeze these? Thanks!
I have not frozen these cookies, but gummies don’t tend to have a good texture when you freeze them. The sugar cookie part freezes fine once baked. You could freeze them cut and baked, and then do the gummy part when you are ready to enjoy them. Hope that helps.
Quick question: how do you prevent the cooled jelly centres from sticking to the parchment paper? Even once completely cooled the paper is stuck on the back of the jelly.
Hi Jess, They have always peeled away from the parchment paper for me once cooled. You could spray just a light spray of oil to help them release. Maybe we are using different brands of gummies that they are sticking a little more. I’ve tried this recipe with more then one brand, but I haven’t tried everything on the market. Hope that helps!
Hi,
I had the same issue as mentioned in another comment—the jelly did not detach from the parchment paper and the more it cooled after the fridge the worse it was—sadly I had to dispose 1/2 of them (or set them aside) as they either broke or the parchment paper would not detach from the cookie and didn’t want to chance my guests eating parchment paper. I had made these with another recipe in the past (hard candies) so thought I knew what I was doing and sadly disappointed on the outcome. Kristy, can you please post the type of gummies you used—who knows maybe that will help
Hi Ida, Sure I’m happy to share. This recipe was first developed for my first cookbook which published in 2020. At that time I tested Haribo, Albanese, Black Forest and the store brand version available at Fry’s, which is owned by Kroger’s and carries all of Kroger’s store brand products. Could you tell me what brand you used? I have made these cookies since 2020 as well with success, I’m sorry it’s not working with the brand of gummies you have. What brand did you use?
I have also made the kind with the hard candies before and even tested a version with hard candies when I created this recipe, but I didn’t like how hard the hard candies were on teeth, especially when considering kids. So I made the gummy version and all the kids in my life who tried them seemed to prefer the gummy version.
-Kristy