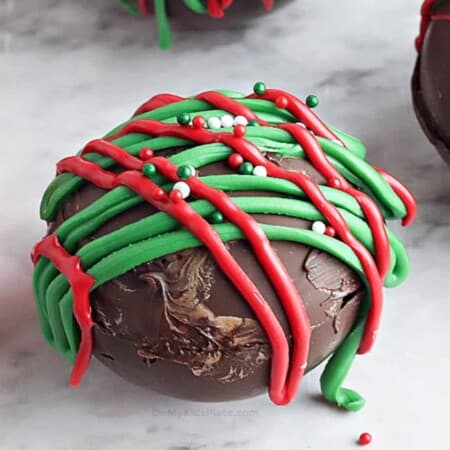

Hot Chocolate Bombs
These hot chocolate bombs bring a sweet burst of chocolate fun to your holiday. Learn how to make these fun chocolate holiday treats that are perfect for gifts and fun!
Equipment
- Round silicone mold
Ingredients
- 12- ounce package semi-sweet chocolate chips
- 1 packet instant cocoa mix
- 1 cup mini marshmallows
- ¼ cup red melting chocolate optional
- ¼ cup green melting chocolate opitional
- ¼ cup Christmas sprinkles optional
- 6 cups hot milk to make the bombs
Instructions
- Place the semi-sweet chocolate chips in a microwave safe bowl and microwave in 30 second intervals at half power. Stirring between each interval, until the chocolate chips are fully melted. Be careful not to get any liquid into the chocolate, or the chocolate will seize and become grainy.
- Put a spoonful of melted chocolate inside one cup on the silicone mold. Use the back of the spoon (or an icicing spatula) to spread the chocolate up the sides of the mold. Coat the inside of all of the molds, tipping the mold to even out the chocolate as needed. Be generous with the chocolate, and make sure to fill in any holes that you can.
- Any remaining chocolate you'll want to set to the side. This will be used for sealing and decorating the bombs.
- Allow the chocolate to set completely, placing the molds in the refrigerator. This will take about 2-3 hours. If you live somewhere that is very warm or humid it may take a little longer.
- Make sure your chocolate is set by peeling a little of the mold away and making sure it's firm. Remove each of the chocolate pieces from the mold by carefully popping them out of the silicone mold without breakng them. Add a few small spoonfulls of instant hot cocoa mix to half the pieces of chocolate. Top the bottom halves with marshmallows.
- Reheat the chocolate in 15 second intervals until melted. Pick up an empty chocolate piece and dip the edges into the melted chocolate. Carefully place it on top of a filled piece and lightly press it into place. Use your finger to smooth melted chocolate around the seam. Continue until all the chocolate bombs are sealed.
- Melt the red and green chocolate according to the package instructions, similarilyto how we melted the chocolate. Place the melted chocolate into zip loc bags or icing pipping bags. Snip a small piece of the corner of the bag. Drizzle the colored chocolate over the top of the bombs to decorate and add sprinkles if desired.
- Allow the chocolate decorations to set in the fridge for about 1 hour. Chocolate bombs can then be exploded by pouring warm milk over the cocoa balls in a large mug. Enjoy!
- To make the hot chocolate bombs, place the bomb in the bottom of a mug. Pour one cup of hot milk over the top of the bomb to melt the chocolate. When the chocolate is completely melted, stir to combine.
Video
Notes
NOTE ABOUT CLOSING THE CHOCOLATE BOMBS I've found an even easier way to seal the hot chocolate bombs.
- Turn on your oven to about 300 degrees and place a cookie sheet inside.
When the cookie sheet is warm, pull it out of the oven and put a piece of parchment paper over it. - Touch the edge of the hot chocolate bomb to the hot pan on the paper for a few seconds to melt the edge, then seal the chocolate bomb shut.
- If your pan starts to become too cool, slide the parchment paper off the pan and place it back in the oven to heat up again. Using the parchment paper makes it much easier to clean up the chocolate, but we don't' want to scorch it in the oven.
Nutrition
Calories: 342kcal